According to the centos-webpanel.com site, CentOS Web Panel (CWP) is a FREE Web Hosting Control Panel designed to be able to quickly and easily manage both a dedicated and Virtual Private Server (VPS). CWP offers a variety of features for server management by minimizing the use of the Secure Shell (SSH) console when you want to do something on the server.
Before initializing the CWP Installer, several things needed to be considered, such as:
- CWP only supports static Internet Protocol (IP) addresses.
- CWP does not provide UNINSTALLER so, removing CWP can only be done by reinstalling the server.
- Install CWP only on the freshly installed operating system without making configuration changes.
- CWP supports CentOS 6, RedHat 6, or CloudLinux 6 operating systems with MINIMAL version installation and English version only. CentOS 7 is also supported, and it’s a recommendation to install the MINIMAL version.
- The hardware requirement for installing a CWP is Random Access Memory (RAM) of at least 512MB for 32-bit operating systems, while for 64bit the minimum RAM is 1GB. The recommendation is 4GB + RAM to perform all functions such as Anti-virus scan on emails. The minimum hard disk capacity is 10GB.
In this tutorial, I think that you already have a Virtual Private Server (VPS) that has the CentOS 7 Linux operating system installed. If not, you can try Google Cloud as in this tutorial. It so happened that the previous author had access to the Google Cloud Compute Engine (GCE).
The steps for installing CWP on GCE with CentOS 7 are as follows:
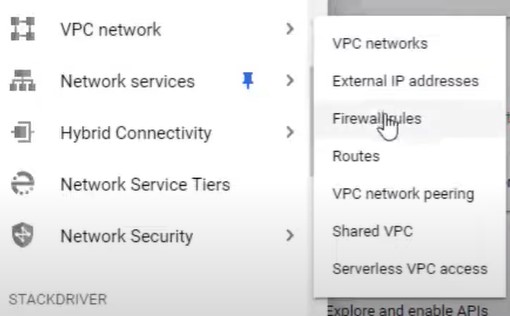
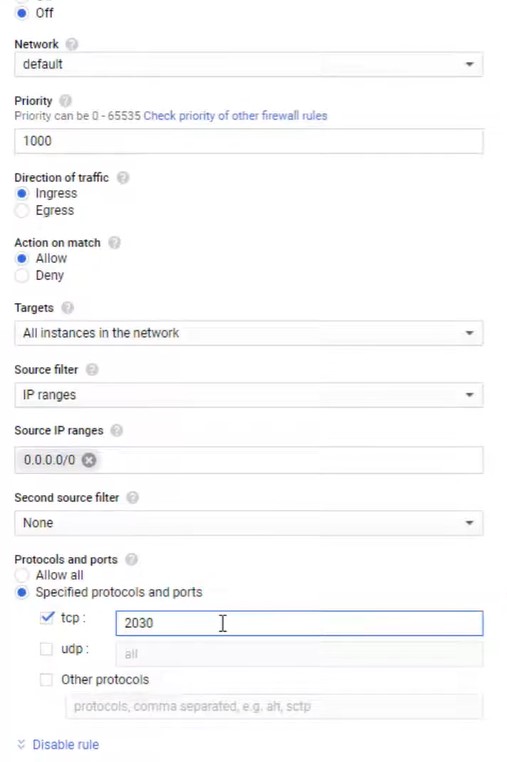
1. Before we install Centos web panel to CentOS 7 on Compute Engine Google Cloud, before we have to make firewall rules, the settings per port are 2020,2031,2082, and 2083. You can see below this example.
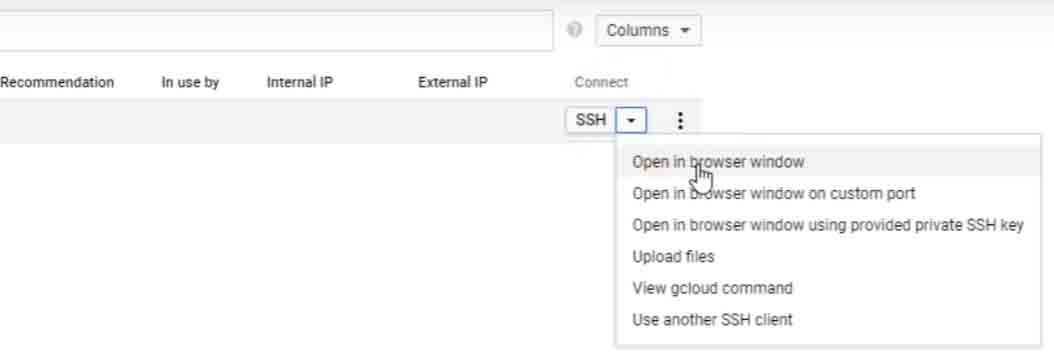
2. Access CentOS 7 via SSH Google Cloud Compute Engine. An example you can be seen in the following image:
3. Before starting for installation we are required to type the command sudo-s so that we get root access or superuser do. Installing the required packages (require package) for the CWP installation:
yum -y install wget
4. Update the server using the command:
5. Reboot the server using the command:
6. After rebooting, do remote access back to the Compute Engine. Then we retype sudo -s, and before installing the CPW script we have to move to the /usr/local/src directory using the command:
7. Download the CWP installer file for CentOS 7 using the command:
8. Execute the CWP install script using the command:
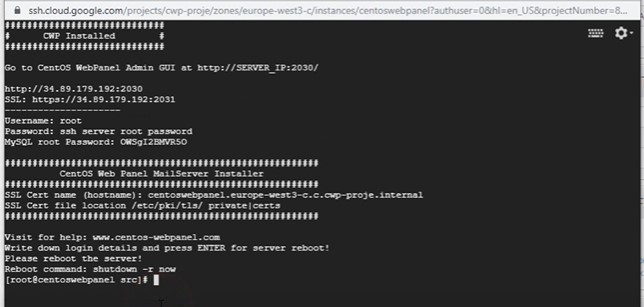
9. Wait until the CWP installation process is complete. When the CWP has been installed, a message will appear as shown in the following image:
If successful, there will be information on how to access the CentOS WebPanel Admin, via http://SERVER_IP:2030 or https://SERVER_IP:2031 for MySQL root Password.
10. Type reboot or shutdown -r to restart CentOS.
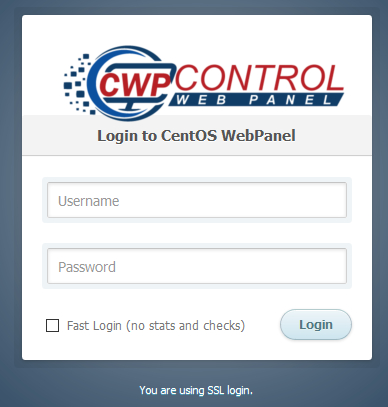
11. Accessing CWP Admin via a browser at the address http: // SERVER_IP: 2030 or https: // SERVER_IP: 2031, a login page will appear, as shown in the following image:
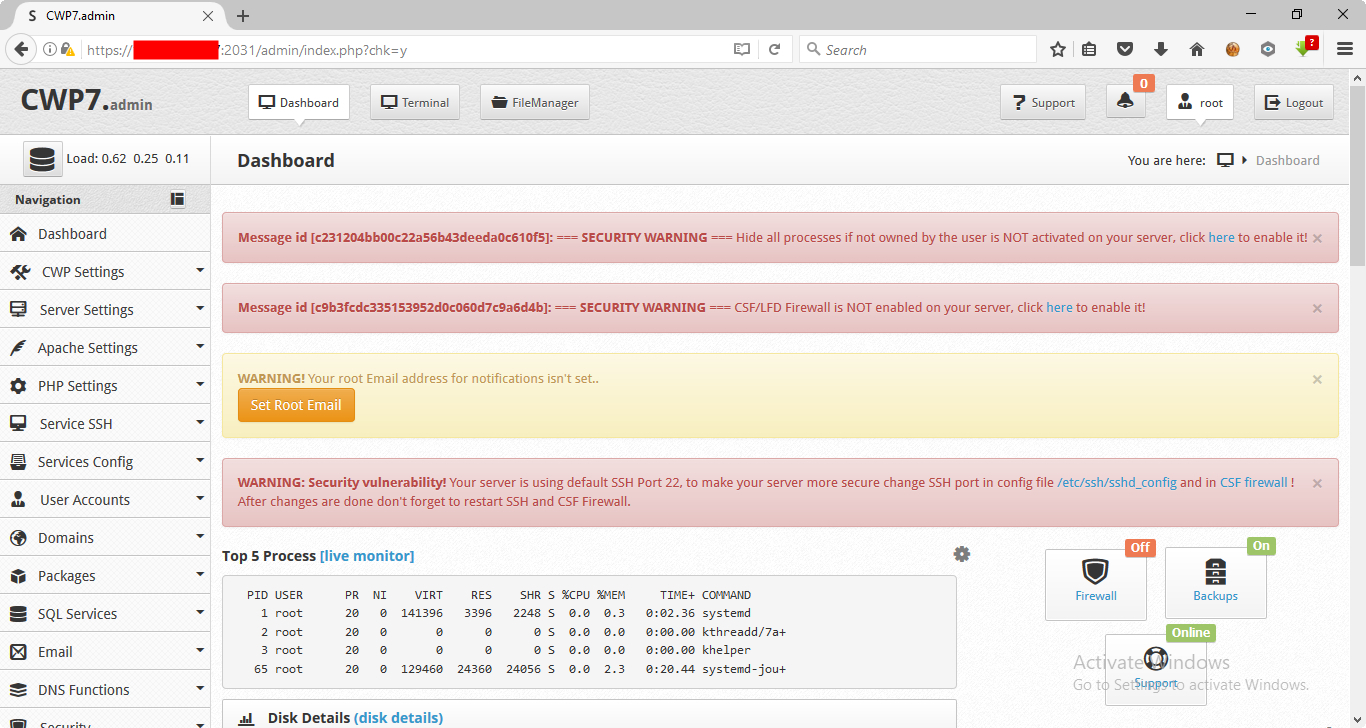
12. Log in using the username “root” and the password is the password from the user “root”. Click the Login button. Next, the Dashboard page of the CWP Admin will appear, as shown in the following image:
Like the picture above, it means that you have successfully installed CWP on Compute Engine CentOS 7. Hopefully, the tutorial that has been giving is useful. Thank you.






![How to Install Windows 10 [Pictures and Explanations] How to Install Windows 10](https://mas-alahrom.my.id/wp-content/uploads/2021/12/tutorial-picture-how-install-windows-10-350x250.jpg)


Thanks for the info. Is such a great and beautiful tutorial.
You’re welcome 🙂