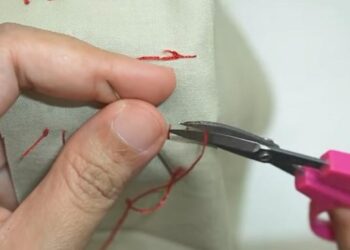
Sewing is a craft that uses needles and threads to tie something or connect something. The history of sewing dates back thousands of years. Sewing has its basic sewing technique, in contrast to weaning and embroidering. In general all still used basic sewing techniques traditionally, until the sewing machine came out in 1790, invented by Thomas Saint.
Variations Sewing Stitch
Nowadays, most tailors use sewing machines more often. The engine is divided into two traditional and electric. Even so, the basic techniques of sewing are still studied because buying machines requires greater capital. Another reason is that using basic sewing techniques will provide much better results and variations than machines. Here’s an explanation for the basic techniques of sewing:
1. Stitch Baste
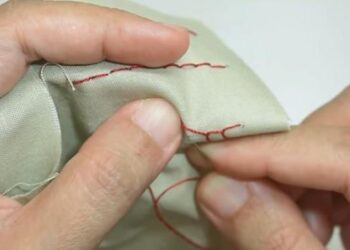
The basic technique of sewing stitch Baste is a technique whose pattern moves from the child to the left. This stitch technique is useful to make sewing even more neat even perfect. The Baste stitch pattern has 3 functions, namely sewing the side of the fabric, closing the end side of a shape, and making the fabric have a wrinkle effect.
As for the stitch technique Baste is divided into 3 types, namely:
Stitch Baste Reguler : This technique is done with an err distance, different.
Stitch Baste Certain Distance: This technique uses a consistent distance. This type of stitch is useful for temporary stitching.
Stitch Baste Gap : This technique uses one space. between each stitch. This stitch is made with the thread stringed so that when the stitch is finished, there is a trace of the last stitch.
2. Stitch Stab Track / Reverse
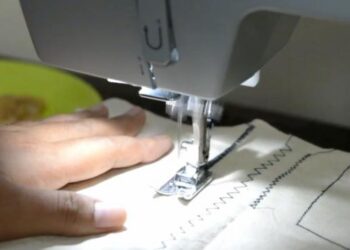
The basic technique of sewing next is the technique of stitch stabbing traces or other names stitch stab back. Stitch stab this trail has the same groove as the sewing machine. The way to create a stitch pattern to stab the trace is to double stitch from the top stitchan. The function of stabbing traces is to make decoration of line decoration that is straight, circular, or other shape according to the desired design. An example of the result is a motif on a box-shaped sarong, creating accented lines, writing, and more. Another function is to connect the fabric with other fabrics and zip connecting with fabric.
3. Flannel Stitch
The basic technique of sewing flannel stitch is commonly used as a method of sewing the fringes of the diobrased clothing. Flannel stitch is used on fabrics that have an expensive selling value. The flannel stitch technique has 3 uses namely as decoration, basic stitchan, and embroidery tires with tight distance that can follow the motif.
The way to apply flannel stitch is to do a stitch on a fabric that has been 3-4cm thick with a step back stitchan 0.75 cm down. Stitch the needle to the right and mundr again 0.5 cm. Stitch it back up the first stitchan and continue until it’s done.
4. Stitch Feston
Feston has a function to finish tiras on the seams. An example is the circumference tiras on the arms in the baby’s clothes. Besides, Feston stitch patterns also serve as decorations. Especially when the combination of basic and decorative thread colors has good alignment. The ornate shape that can be made with a feston pattern is a flower-like shape.
5. Stitch Wrap
The cladding stitch pattern is useful for sewing damaged tiras on the roller klim. Another function is as a finishing technique on the edges of the seam. The way to sew with the basic technique of stitch wrapping is to go left to right and vice versa with a slight tilt.
6. Stitch Rod / Stalk
Useful specifically as an ornament on an ingredient. The result that can be obtained from the stitch rod is following the result which is the shape of the stem. It does not close the possibility to create other creations as well with stitch rods, but it is generally made to make rods.
The way to apply the stem stitch pattern is to sew back 1/2 cm and associate 5-6 threads on the material. After that the needle is pulled out and produces a stitch stalk. The pattern is repeated until it gets the desired result. If you want to make the size larger then the stitching distance is made tighter and hooks the fabric larger.
7. Stitch Chain
As the name suggests, the basic technique of sewing chain stitch has a pattern that forms a chain. This pattern is useful for decorating materials with chain shapes, for example tree branches and tree branches.
How to make a chain stitch is to step forward in sewing. First, stitch the needle from the bottom up the fabric. After that the needle will be stitched back into the hole where the needle forms a circle due to the previous stitch. Pull the needle and repeat the pattern until the desired pattern is formed.
8. Cross Stitch
The cross stitch pattern is used as a decoration on the material. The way to create a cross stitch pattern is to sew from top right to bottom left, after which it is made its direction to the bottom right. The second stitch will start from the bottom right and then towards the top left. Make sure the stitchan is aligned to the top and bottom so that a neat cross stitchan is formed. Repeat until you get the desired result.
9. Stitch Piquar
Stitch piquar technique is a basic sewing technique that is useful for pairing furry materials. It is commonly used in fur coats, jackets, or suits. Another function of stitch piquare is as decoration in other clothes.
10. Stitch Som
Som stitch patterns are used to sew and lock folds on materials. Fabrics that have been locked with stitch som patterns cannot be reopened easily. How to use som technique is to pierce the thread on the folded fabric. Pull the thread and then stitch it back next to the stitchan with a tight distance. Repeat until you have finished sewing the folds.
11. Flat Stitch
The basic technique of sewing flat stitches is directed from left to right. This pattern is created by descending straight up and composed covering the entire surface of the ornamental variety. This technique is commonly used to make ornaments of the shape of leaves or flower crowns, and the nose of dolls.
12. Open Chain Stitch
It is one of the various forms of ornamental stitch. This stitch is a chain stitch with its variations. This pattern is generally made into a decoration on the doll because it forms an open mouth.
13. Stitch Bars
Similar to stitch roll type. The difference is in its function. The bars serve to decorate the surface, while the stitch roll technique is useful for connecting two fabrics into one. Examples of stitch bars are the shape of the eyes, nose, mouth, and flower crown.
14. Stitch Roll
The basic technique of stitch roll sewing, as its name suggests, forms a lingkaaran when applied. This technique is used to connect the fabric so that the ends of the fabric do not accumulate.
15. Stitch Bullion
Bullion stitch technique is not a basic sewing technique. Bullion is an advanced technique rarely used by tailors. The bullion stitch pattern creates small grains to form small flowers and others.
16. Stitch Roumani / Rumani
Roumani’s technique is the same as stitch bullion. This technique has advanced levels and is not commonly used. Roumani stitch patterns are useful for forming decorations with detail, for example long leaves and flowers.
17. Stitch Satin
The Stitch Satin pattern is used to create leaf-shaped decorations in general. In addition to leaves, stitch satin techniques can also be used to form decorations that vary as desired.
18. Stitch Flat
The flat stitch pattern is used as a decoration in stitches. It is common to fill in blank fields on the outline that have been created.
19. Stitch Straight
The basic technique of sewing a straight stitch has the same pattern as its name suggests, i.e. straight. This technique is used to form flowers and grasses with straight seams.
20. Stitch Flowers
The basic technique of sewing stitch flowers has a very unique pattern. The pattern of flower stitch varies greatly with the result of forming the skeleton of a flower. How to stitch different flowers according to the desired flower.
21. Stitch Veston
The technique of sewing stitch vetson is used on tablecloths, blankets, fabric edges, clothing edges, etc. Including easy and can be done as teaching to children. The direction of the seam can be done from left to right or vice versa. Start the seam by piercing from inside the fabric at a position of 1 cm from the end of the fabric, as it pulls out. Stitch it back on the fabric with the position near the first hole and pull it gently. After that there will be a circle of threads, input the thread on the circle and then drag it. Repeat until you’ve finished sewing.


